Overview
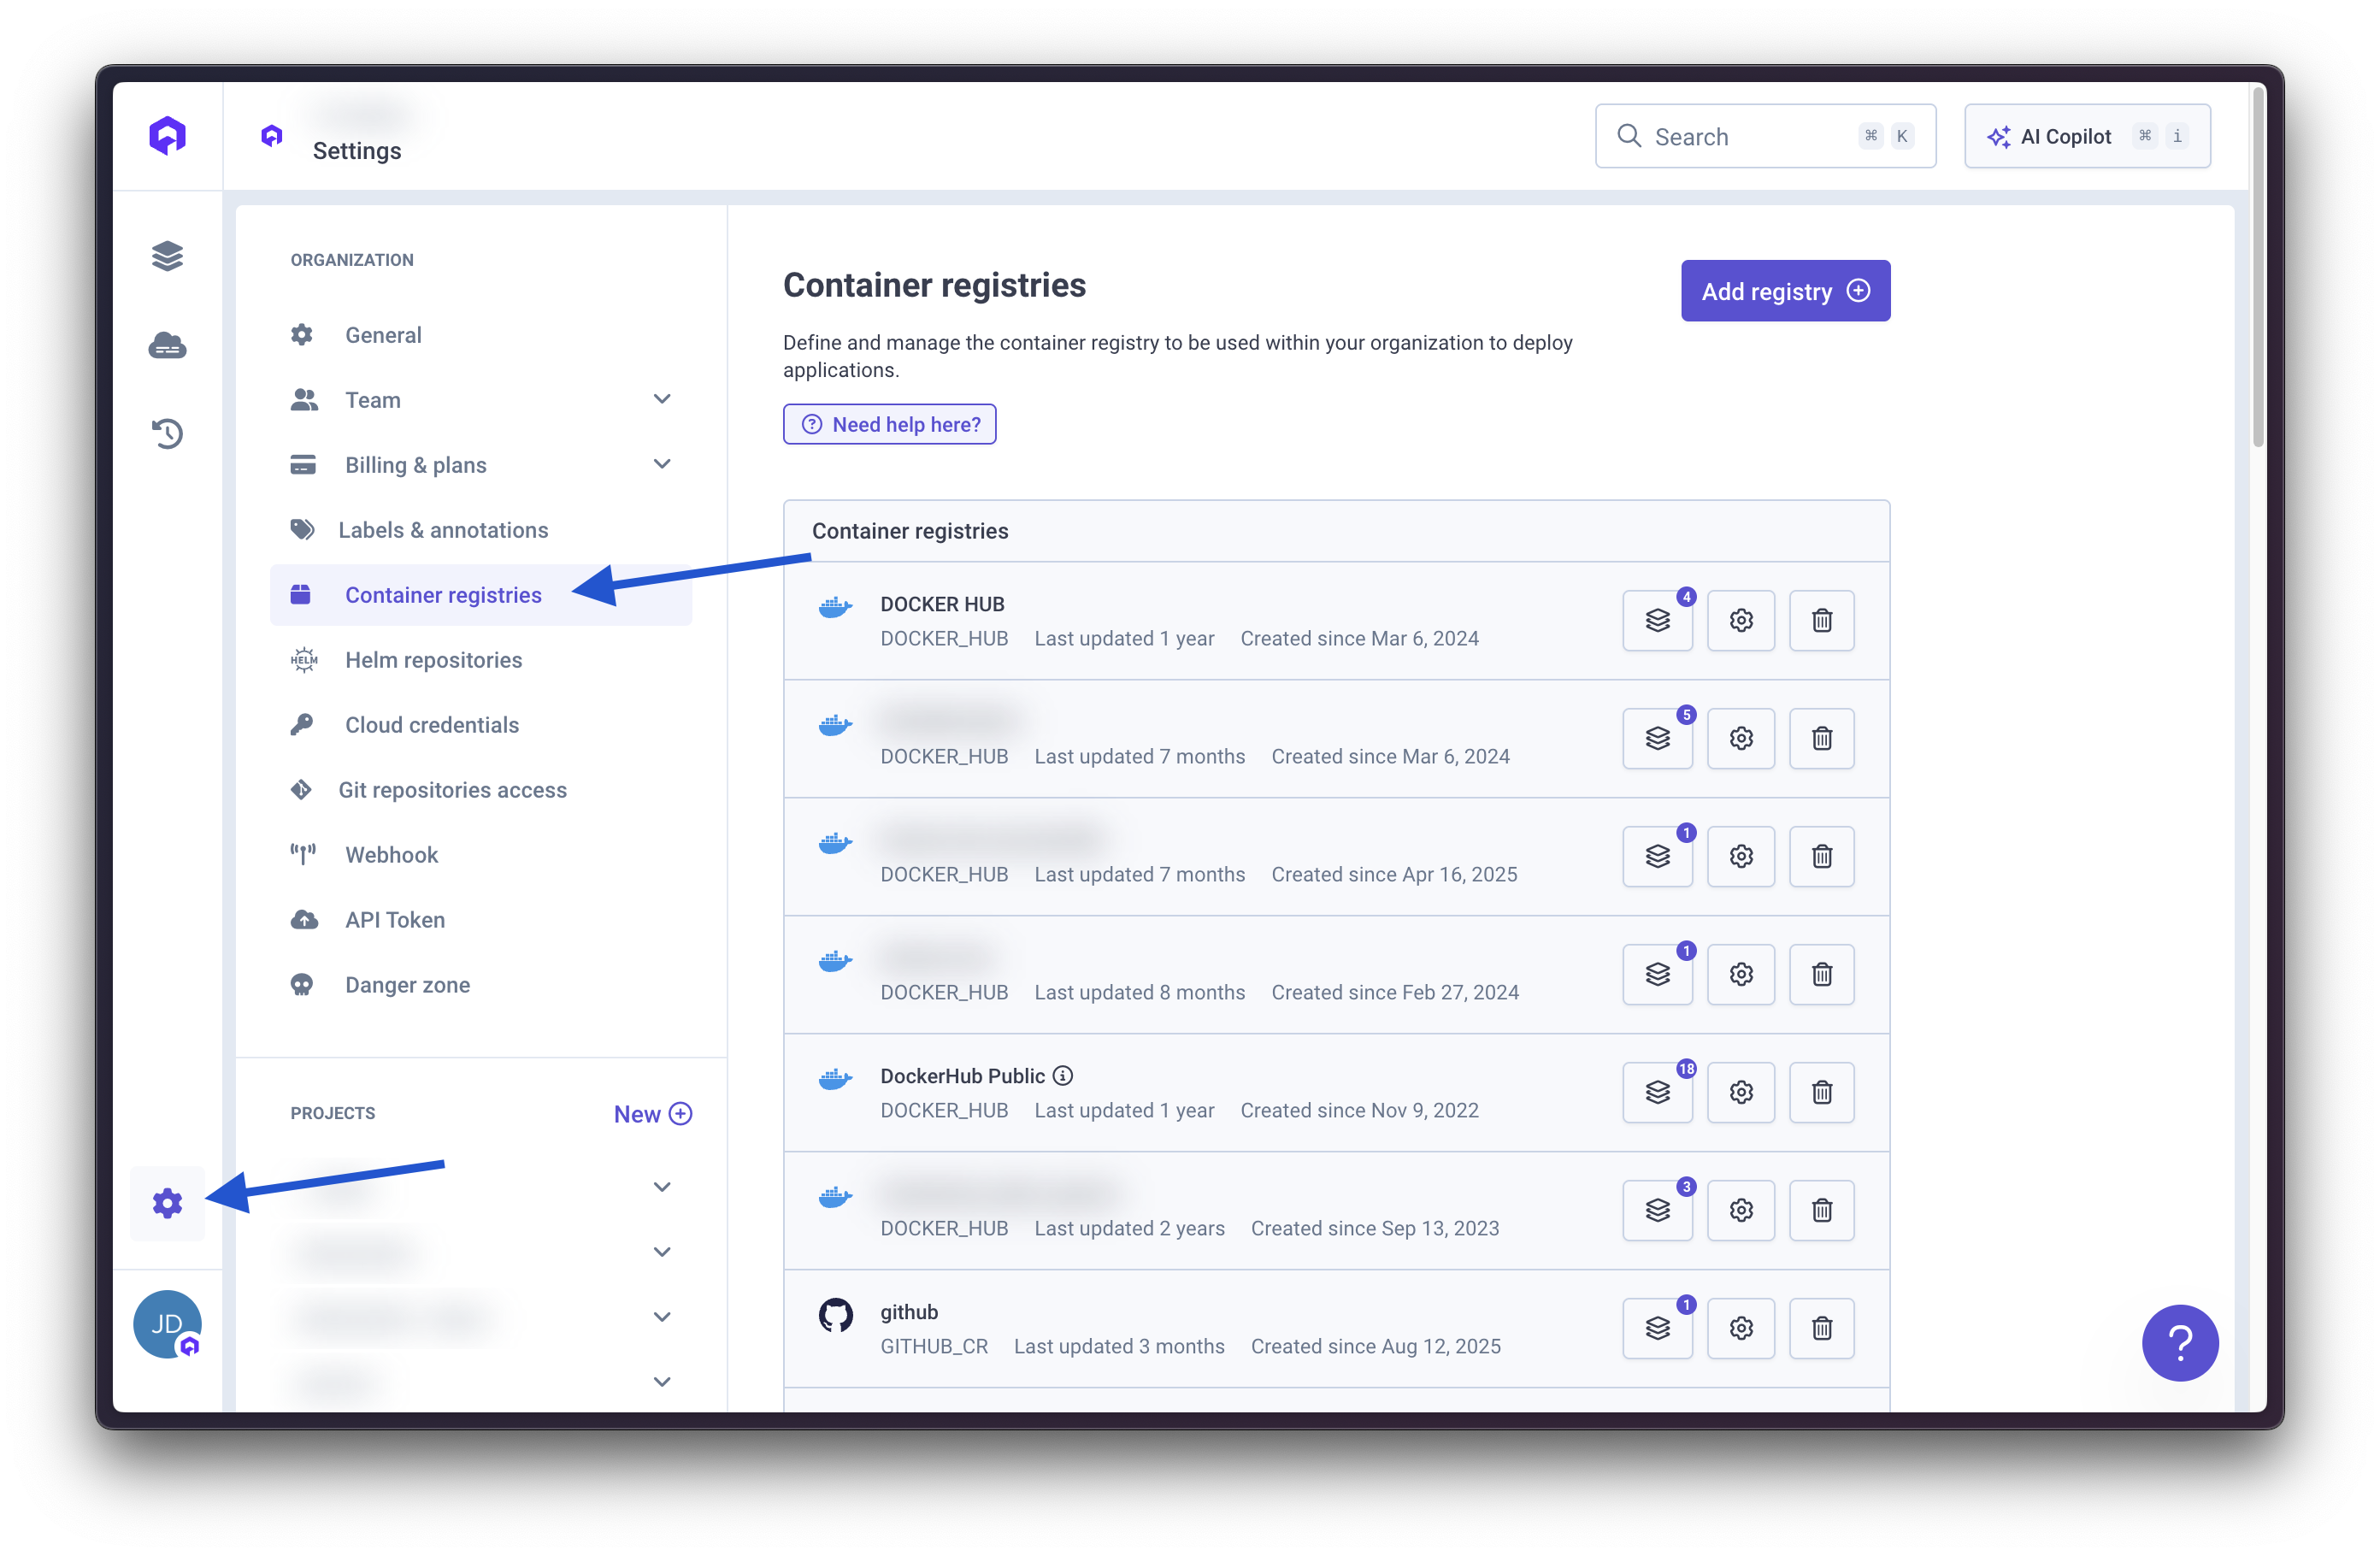
This section allows you to define the container registries available within your organization. Once configured, only images stored in these registered container registries will be allowed to be deployed on your clusters. By connecting container registries to your organization, you can deploy applications using images from these registries across all your projects and environments.Container registries configured here apply to the entire organization and are available for all projects.
Accessing Container Registry Settings
To manage container registries:- Navigate to Organization Settings → Container Registries
- You’ll see a list of all configured registries

Supported Registry Types
Qovery supports the following container registry providers:- ECR (AWS Elastic Container Registry)
- GCP Artifact Registry (Google Cloud Artifact Registry)
- Scaleway Container Registry
- Docker Hub
- GitHub Container Registry (GHCR)
- GitHub Enterprise Container Registry
- GitLab Container Registry
- Public ECR (AWS Public Elastic Container Registry)
- Generic Container Registry (any Docker-compatible registry accessible via
docker login)
Create a Container Registry
Provide Required Information
Enter the necessary authentication details based on your registry type.Example for AWS ECR:
- Registry URL:
https://<aws_account_id>.dkr.ecr.<region>.amazonaws.com - Region: AWS region where your ECR is located (e.g.,
us-east-1,eu-west-1) - Access Key ID: AWS IAM access key with ECR permissions
- Secret Access Key: AWS IAM secret access key
Each registry type requires different configuration fields. The form will adapt based on your selection.
Once added, the container registry will be available for all projects and environments in your organization.
Modify an Existing Registry
To edit a container registry:- Locate the registry in the Container Registry list
- Click the wheel button (edit icon) next to the registry
- Update the registry configuration as needed
- Click Save to apply changes

Delete a Container Registry
To remove a container registry:- Locate the registry in the Container Registry list
- Click the trash button (delete icon) next to the registry
- Confirm the deletion
Best Practices
Organize by Environment
Organize by Environment
Consider creating separate registry connections for different environments (development, staging, production) for better security and access management.
Use Descriptive Names
Use Descriptive Names
Name registries clearly to indicate their purpose:
aws-ecr-production-us-east-1docker-hub-public-imagesgcr-staging-europe
Regular Credential Rotation
Regular Credential Rotation
Periodically rotate registry credentials for security:
- Create new credentials in your registry provider
- Update the registry configuration in Qovery
- Test with a deployment
- Remove old credentials from the provider


