Qovery allows you to configure a SAML or OIDC connection with your Identity Provider (IDP).

How to Enable SSO

1

Contact Qovery

Contact your Customer Success Manager (CSM) to enable the SSO feature for your organization.
  • Qovery will provide you a unique $CONNECTION_NAME that you will need to configure your IDP
  • You will need to provide required information to setup the configuration on Qovery side
2

Validate Authentication Flow

When the configuration is done on your side and on Qovery side, we plan a session to validate the authentication flow.
3

User Provisioning

Once your users are provisioned using SAML or OIDC inside your organization, you will need to remove old users and transfer your organization ownership.

Configure Your IDP

The following sections use Okta as IDP to illustrate the setup and information to share. The same principles apply to other Identity Providers.
  • SAML
  • OIDC

Configure Your SAML Application

Create SAML Application

Create your SAML application and check SAML 2.0:
Create Okta Application

Qovery Authentication Information

In SAML Settings > General section:
  • Set the Single sign-on URL to:
    https://auth.qovery.com/login/callback?connection=$CONNECTION_NAME
    
  • Enable the Use this for Recipient URL and Destination URL checkbox
  • Set the Audience URI to:
    urn:auth0:qovery:$CONNECTION_NAME
    
Leave the other fields in this section at their default values.
SAML Settings

Configure Attribute Statements

In Attribute Statements section:
  • Add attribute email to point to your user email property (e.g., user.email in Okta)
  • Add attribute name to point to your user full name property (e.g., user.displayName in Okta)
User Attributes
You may not see the “user.displayName” populated in the Okta admin console. See this Okta documentation for more information.

(Optional) Configure Group Attribute Statements

If you want to automatically assign a Qovery role according to your users’ groups (see Configure Group Synchronization), you need to expose this information:
  • Add attribute groups to match the targeted IDP groups you want to expose
  • Use .* to expose all groups assigned to your users
Group Attributes

(Optional) Enable Global Token Revocation

In Logout section:
  • Set the Endpoint URL to:
    https://qovery.eu.auth0.com/oauth/global-token-revocation/connection/$CONNECTION_NAME
    
  • Set Subject format to “Issuer and Subject Identifier”
Global Token Revocation

SAML Information To Share

Required Information

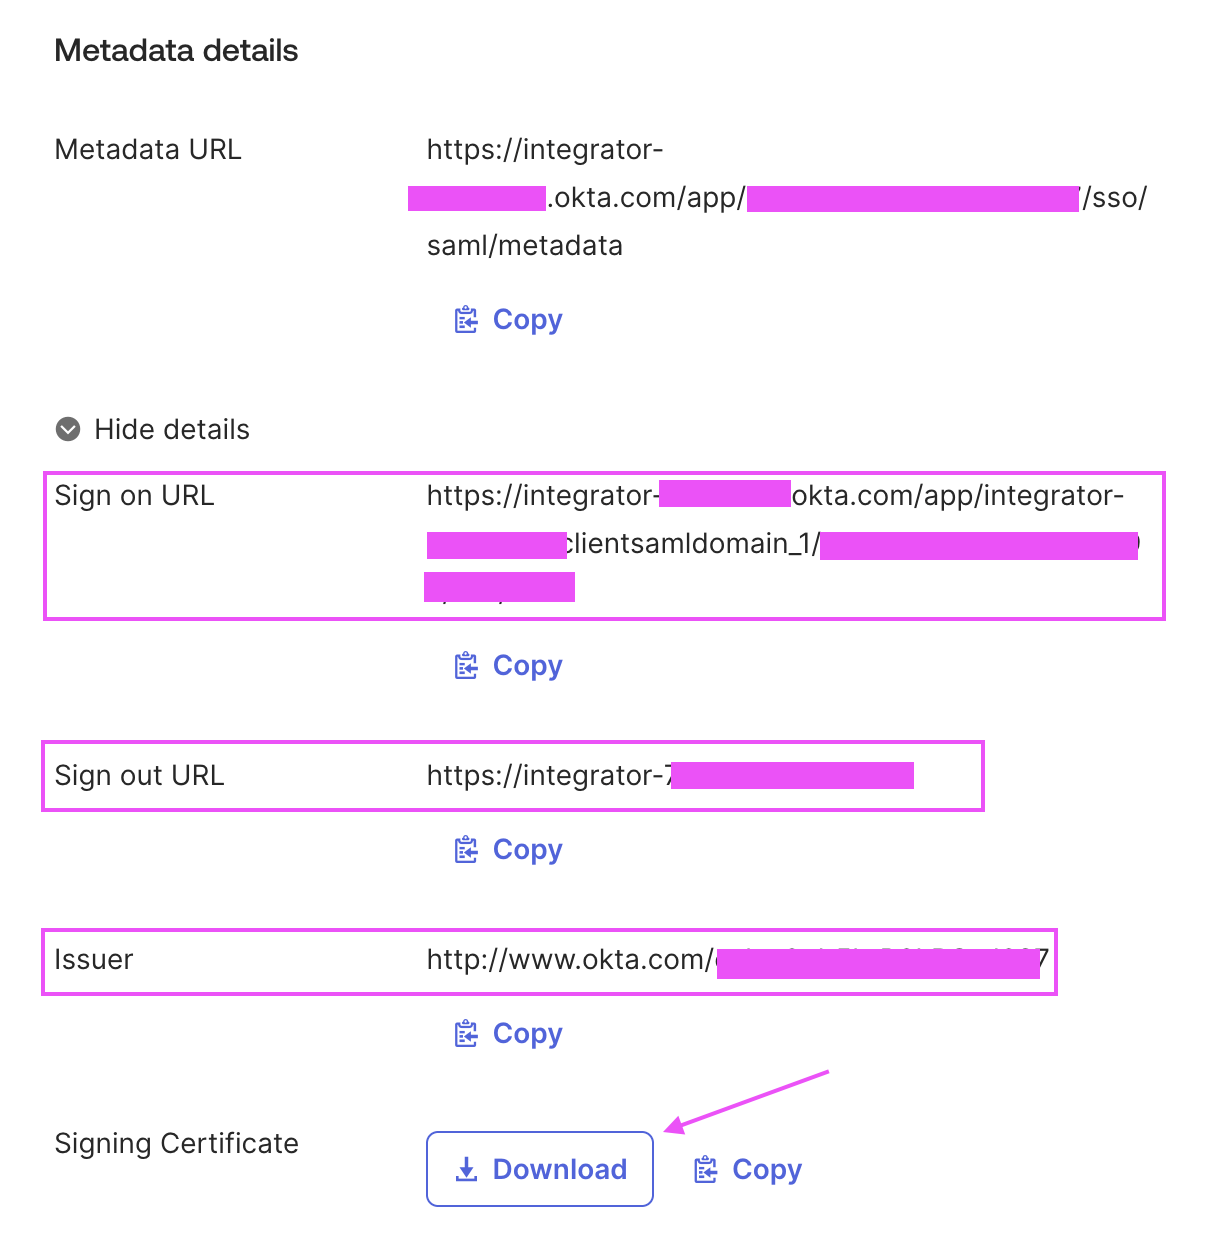
Go to Sign On tab and gather the following required information:
  • Sign on URL
  • Signing Certificate
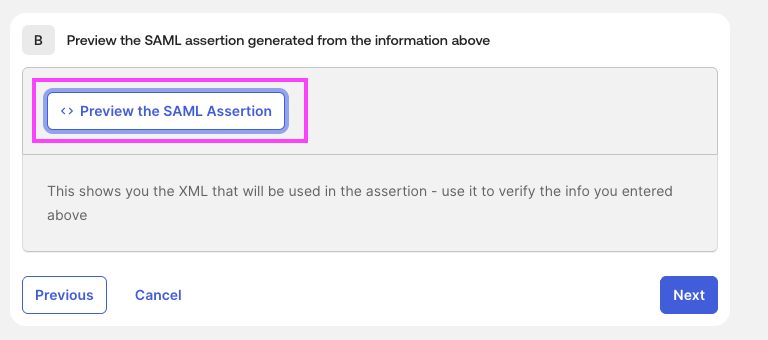
Go to General section, edit SAML Settings section, and click on Preview the SAML Assertion. This will generate an XML file that you will need to share.
SAML Assertion
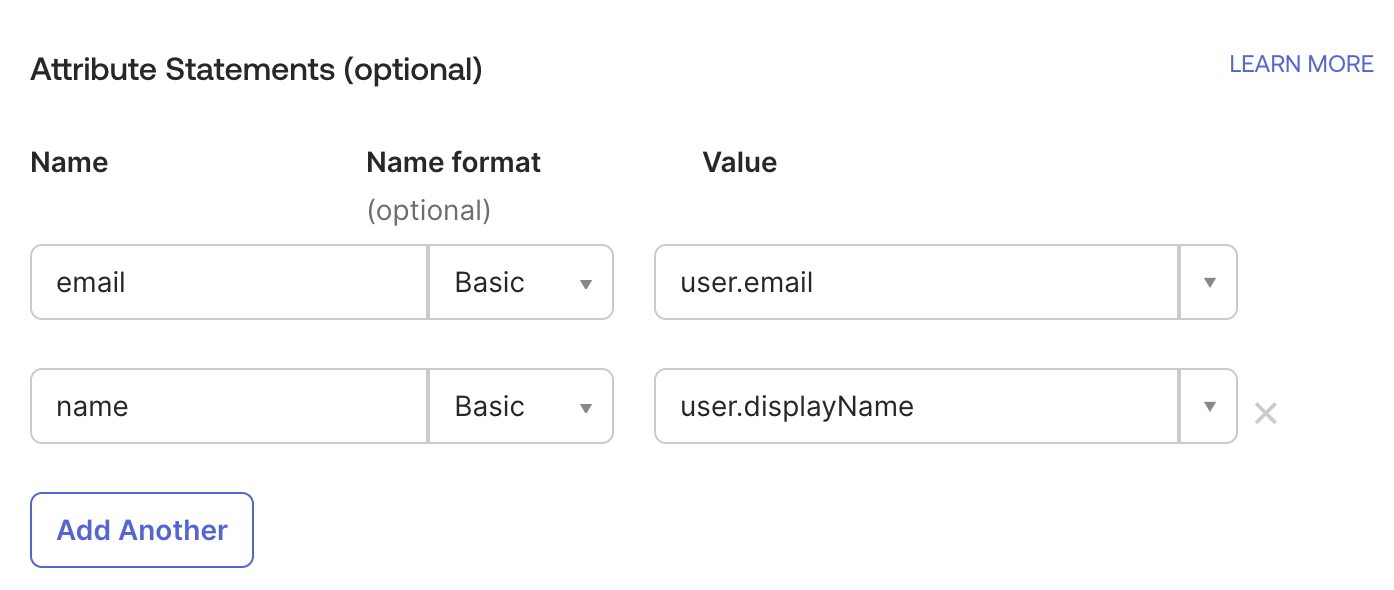
Validate your XML: You should see in the SAML Assertion XML file the fields that IDP will expose to Qovery inside <saml2:AttributeStatement>, for example:
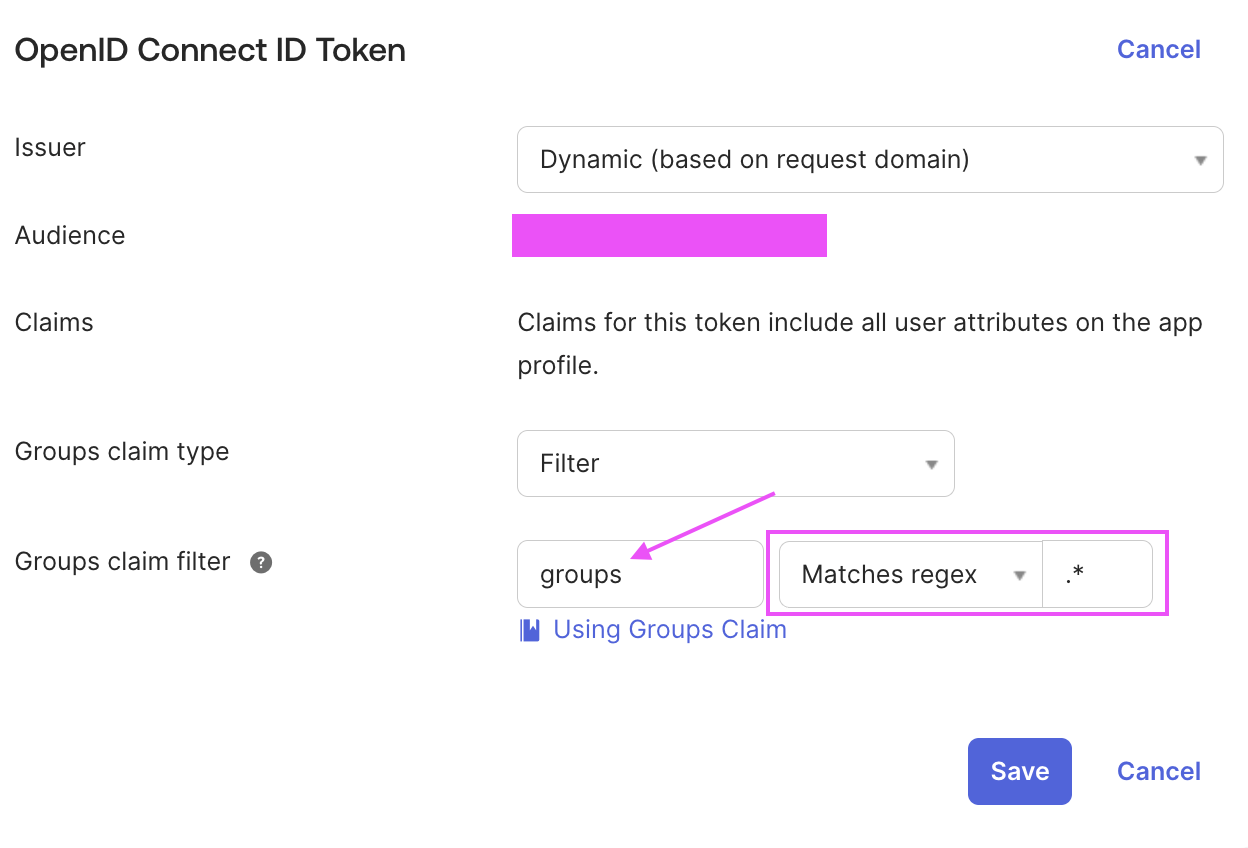
<saml2:AttributeStatement>
    <saml2:Attribute Name="email" NameFormat="urn:oasis:names:tc:SAML:2.0:attrname-format:basic">
        <saml2:AttributeValue
            xmlns:xs="http://www.w3.org/2001/XMLSchema"
            xmlns:xsi="http://www.w3.org/2001/XMLSchema-instance" xsi:type="xs:string">user@example.com
        </saml2:AttributeValue>
    </saml2:Attribute>
    <saml2:Attribute Name="name" NameFormat="urn:oasis:names:tc:SAML:2.0:attrname-format:basic">
        <saml2:AttributeValue
            xmlns:xs="http://www.w3.org/2001/XMLSchema"
            xmlns:xsi="http://www.w3.org/2001/XMLSchema-instance" xsi:type="xs:string">Foo Bar
        </saml2:AttributeValue>
    </saml2:Attribute>
</saml2:AttributeStatement>
If you want to synchronize groups, you should see the property groups here as well.

(Optional) Global Token Revocation Information

If you want to enable global token revocation, you’ll need to also share:
SAML Attributes to Share

Configuration Qovery Side

Before this step, you have validated your SAML/OIDC authentication flow with your CSM.

Check Your Enterprise Connection

You can use the CLI to check your connection configuration:
qovery enterprise-connection get
This should give you the following output:
# Connection Name: $CONNECTION_NAME

# Connection Settings
Default Role | Enforce Sync Group
viewer       | ✗ false

# Group Mappings
Qovery Role | Your IDP Groups
By default:
  • The “Default Role” is set to “viewer”
  • The synchronization on IDP groups is disabled

Configure The Default Role

This is the Qovery role that will be associated to your IDP users when they log in to Qovery. You can indicate either a Qovery provided role or a custom role:
qovery enterprise-connection update \
  --connection=$CONNECTION_NAME \
  --default-role="Devops"
If you choose to enable the “Enforce Sync Group” parameter, the default role is used in case no mapping is found for your IDP users group.

Configure Group Synchronization

Group synchronization tells Qovery to always synchronize the Qovery role with your IDP users’ groups. You need to configure Group Mappings when setting Enforce Sync Group to true.

Enable Group Synchronization

qovery enterprise-connection update \
  --connection=$CONNECTION_NAME \
  --enforce-sync-group=true

Add Group Mappings

You can create a mapping table to associate the expected Qovery role based on your user IDP group. Example 1: Users with IDP groups “Administrators” or “DevSecOps” get the “admin” Qovery role:
qovery enterprise-connection group-mappings add \
  --connection=$CONNECTION_NAME \
  --qovery-role="admin" \
  --idp-group-names="Administrators,DevSecOps"
Example 2: Users with IDP group “Devs” get the “Qovery Devs” custom role:
qovery enterprise-connection group-mappings add \
  --connection=$CONNECTION_NAME \
  --qovery-role="Qovery Devs" \
  --idp-group-names="Devs"
The output should be:
Qovery Role | Your IDP Groups
Qovery Devs | Devs
admin       | Administrators ; DevSecOps

Manage Group Mappings

qovery enterprise-connection group-mappings list \
  --connection=$CONNECTION_NAME
qovery enterprise-connection group-mappings delete \
  --connection=$CONNECTION_NAME \
  --qovery-role="admin"
Do not forget to configure your IDP correctly to expose a groups attribute if you want to benefit from the mappings configuration.

User Provisioning

Users are not auto-provisioned into Qovery. They need to log in at least once to Qovery using the SAML or OIDC authentication flow to be present in your organization. Qovery defines a user according to both their email and their authentication provider. This means that when your users use the new SAML/OIDC authentication flow, they will be considered as new users in your organization. You will need to manually remove the old users that were using classic SSO login.
Billing ConsiderationQovery computes billing according to the number of users present in your organization.During the transition from classic SSO to SAML/OIDC authentication flow, you may experience a billing increase if you don’t delete old users progressively. If it happens, a refund will be done the next month.

Transfer Organization Ownership

Don’t forget to transfer your organization ownership to the new user that will be using SAML/OIDC authentication flow.
1

Identify the New Owner

Ensure the new owner has logged in at least once using the SAML/OIDC authentication flow.
2

Transfer Ownership

Follow the organization ownership transfer process in the Qovery console.
3

Remove Old Users

Progressively remove old users who were using classic SSO authentication.