> ## Documentation Index
> Fetch the complete documentation index at: https://www.qovery.com/docs/llms.txt
> Use this file to discover all available pages before exploring further.
# Qovery-Managed Scaleway Kapsule
> Learn how to configure your Scaleway Kubernetes clusters on Qovery
## Creating a Scaleway Kapsule Cluster
### Connect Your Scaleway Account
Qovery needs API credentials to manage resources in your Scaleway account. We use a secure API key approach with granular permissions.
### Generate API Key
1. Log into [Scaleway Console](https://console.scaleway.com)
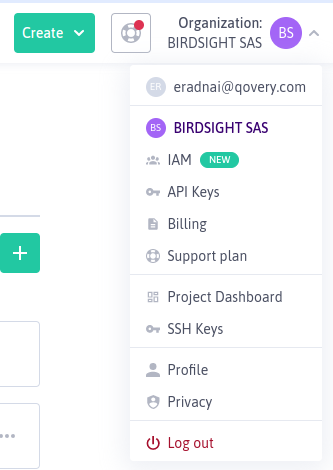
2. Click your profile/organization name in the top-right
3. Select **Identity and Access Management (IAM)**
 1. Navigate to **Applications** tab
2. Click **+ Create application**
3. Name it: `qovery-manager` or similar
4. Description: "Qovery cluster management"
5. Click **Create application**
Applications help organize API keys by purpose. You can reuse this application for multiple clusters.
1. Click on your newly created application
2. Go to **API keys** tab
3. Click **+ Generate API key**
4. Description: "Qovery cluster access"
5. Select **Object Storage preferred Project** (your main project)
6. Click **Generate API key**
**Save these credentials immediately!** The secret key is only shown once and cannot be retrieved later.
You'll see:
* **Access key ID**: `SCWxxxxxxxxxxxxxxxxx`
* **Secret access key**: `xxxxxxxx-xxxx-xxxx-xxxx-xxxxxxxxxxxx`
Copy both to a secure location.
1. Go to **Policies** tab in IAM
2. Click **+ Create policy**
3. Name it: `qovery-permissions`
4. Click **Add rule** for each of these permission sets:
**Required Permissions:**
* ✅ **Containers** - Full access (for Kapsule management)
* ✅ **Network Services** - Full access (for VPC, Load Balancers)
* ✅ **Compute** - Full access (for instances)
* ✅ **Storage** - Full access (for persistent volumes)
* ✅ **VPC** - Full access (for networking)
**Optional Permissions:**
* ☑️ **VPC Gateway** - Full access (required if you want to use the [Static IP for egress traffic](/configuration/integrations/kubernetes/scaleway/managed#static-ip-for-egress-traffic) feature)
5. Under **Principal**, attach this policy to your application
6. Click **Create policy**
These permissions allow Qovery to fully manage your Kubernetes infrastructure, including creating instances, configuring networking, and managing storage.
You'll need these identifiers:
**Organization ID:**
1. Go to **Organization Settings**
2. Copy the **Organization ID** (format: `xxxxxxxx-xxxx-xxxx-xxxx-xxxxxxxxxxxx`)
**Project ID:**
1. Go to your **Project Dashboard**
2. Click **Project settings**
3. Copy the **Project ID** (format: `xxxxxxxx-xxxx-xxxx-xxxx-xxxxxxxxxxxx`)
Keep these IDs handy - you'll need them when configuring Qovery.
### Add Credentials to Qovery
1. Go to [Qovery Console](https://console.qovery.com)
2. Go to your organization overview and click on the **Clusters** tab
3. Click **Create Cluster**
4. Select **Scaleway** as the cloud provider
Provide the information you gathered:
* **Access Key ID**: Your Scaleway access key
* **Secret Access Key**: Your Scaleway secret key
* **Organization ID**: Your Scaleway organization ID
* **Project ID**: Your Scaleway project ID
1. Navigate to **Applications** tab
2. Click **+ Create application**
3. Name it: `qovery-manager` or similar
4. Description: "Qovery cluster management"
5. Click **Create application**
Applications help organize API keys by purpose. You can reuse this application for multiple clusters.
1. Click on your newly created application
2. Go to **API keys** tab
3. Click **+ Generate API key**
4. Description: "Qovery cluster access"
5. Select **Object Storage preferred Project** (your main project)
6. Click **Generate API key**
**Save these credentials immediately!** The secret key is only shown once and cannot be retrieved later.
You'll see:
* **Access key ID**: `SCWxxxxxxxxxxxxxxxxx`
* **Secret access key**: `xxxxxxxx-xxxx-xxxx-xxxx-xxxxxxxxxxxx`
Copy both to a secure location.
1. Go to **Policies** tab in IAM
2. Click **+ Create policy**
3. Name it: `qovery-permissions`
4. Click **Add rule** for each of these permission sets:
**Required Permissions:**
* ✅ **Containers** - Full access (for Kapsule management)
* ✅ **Network Services** - Full access (for VPC, Load Balancers)
* ✅ **Compute** - Full access (for instances)
* ✅ **Storage** - Full access (for persistent volumes)
* ✅ **VPC** - Full access (for networking)
**Optional Permissions:**
* ☑️ **VPC Gateway** - Full access (required if you want to use the [Static IP for egress traffic](/configuration/integrations/kubernetes/scaleway/managed#static-ip-for-egress-traffic) feature)
5. Under **Principal**, attach this policy to your application
6. Click **Create policy**
These permissions allow Qovery to fully manage your Kubernetes infrastructure, including creating instances, configuring networking, and managing storage.
You'll need these identifiers:
**Organization ID:**
1. Go to **Organization Settings**
2. Copy the **Organization ID** (format: `xxxxxxxx-xxxx-xxxx-xxxx-xxxxxxxxxxxx`)
**Project ID:**
1. Go to your **Project Dashboard**
2. Click **Project settings**
3. Copy the **Project ID** (format: `xxxxxxxx-xxxx-xxxx-xxxx-xxxxxxxxxxxx`)
Keep these IDs handy - you'll need them when configuring Qovery.
### Add Credentials to Qovery
1. Go to [Qovery Console](https://console.qovery.com)
2. Go to your organization overview and click on the **Clusters** tab
3. Click **Create Cluster**
4. Select **Scaleway** as the cloud provider
Provide the information you gathered:
* **Access Key ID**: Your Scaleway access key
* **Secret Access Key**: Your Scaleway secret key
* **Organization ID**: Your Scaleway organization ID
* **Project ID**: Your Scaleway project ID
 Click **Next** to validate the credentials.
Qovery will test the credentials and verify it can access your Scaleway account.
If validation fails, double-check your API key has all required permissions attached via the policy.
Qovery requires these Scaleway permissions to manage your infrastructure:
* **Containers**: Create and manage Kapsule Kubernetes clusters
* **Network Services**: Configure Load Balancers, DNS, and Public Gateways
* **Compute**: Provision and manage instances for node pools
* **Storage**: Create and manage Block Storage volumes for persistent data
* **VPC**: Configure Private Networks, Security Groups, and network routing
One additional permission is needed for optional features:
* **VPC Gateway**: Required only if you enable the [Static IP for egress traffic](/configuration/integrations/kubernetes/scaleway/managed#static-ip-for-egress-traffic) feature
These permissions are applied via IAM policies attached to your API key's application.
Yes! You can create a custom IAM policy with more restrictive permissions. However, ensure it includes all the resource types needed for managing Kapsule, networking, compute, and storage. Missing permissions may cause deployment failures.
To rotate Scaleway credentials:
1. In Scaleway Console, go to **IAM** → **Applications**
2. Find your application (e.g., `qovery-manager`)
3. Go to **API keys** tab
4. Click **+ Generate API key** to create a new key
5. Update credentials in Qovery Console
6. Wait 24 hours to ensure all systems use new keys
7. Delete the old API key in Scaleway Console
8. Set a reminder to rotate again in 90 days
* **Access Key ID**: Starts with `SCW` followed by alphanumeric characters
* **Secret Access Key**: UUID format (xxxxxxxx-xxxx-xxxx-xxxx-xxxxxxxxxxxx)
* **Organization ID**: UUID format
* **Project ID**: UUID format
All UUIDs use the standard 8-4-4-4-12 hexadecimal format.
### Create the Cluster
Click on `Scaleway` as hosting mode and then `Qovery Managed` option.
In the `Create Cluster` window enter:
* **Cluster name**: enter the name of your choice for your cluster.
* **Description**: enter a description to identify better your cluster.
* **Production cluster**: select this option if your cluster will be used for production.
* **Region**: select the geographical area in which you want your cluster to be hosted.
* **Credentials**: select one of the existing cloud provider credentials or [create new credentials](/getting-started/installation/scaleway#connect-your-scaleway-account).
To confirm, click `Next`.
In the `Set Resources` window, select:
* **Instance type**: select the type of [worker nodes](/configuration/clusters#what-is-a-cluster) you want to deploy to your cluster.
* **Node auto-scaling**: define the minimum and the maximum number of worker nodes that your cluster can run. The lowest number is the number of worker nodes running on your infrastructure at any time, while the highest number is the maximum number of worker nodes that can automatically be deployed as traffic grows. Please note that a minimum of 3 worker nodes is required to deploy your Kapsule cluster.
* **Control plane type**: select the type of control plane managing your cluster. [Click here to know more](https://www.scaleway.com/en/docs/kubernetes/reference-content/kubernetes-control-plane-offers/)
Instance type selection from your Qovery Console has direct consequences on your cloud provider's bill. While Qovery allows you to switch to a different instance type whenever you want, it is your sole responsibility to keep an eye on your infrastructure costs, especially when you want to upsize.
Please be aware that changing the instance type or disk size might cause a downtime for your service.
For more information on the instance types provided by each cloud provider and their associated pricing, see [What are the different instance types available when creating a cluster?](/configuration/clusters#what-are-the-different-instance-types-available-when-creating-a-cluster)
Also, before downsizing, you need to ensure that your applications will still have enough resources to run correctly.
To confirm, click `Next`.
In the `Configure Network` window, configure your cluster networking options:
* **Static IP for egress traffic**: Enable this option if your applications need to connect to external services that require IP allowlisting. When enabled, your cluster will use a fixed public IP address for all outbound traffic.
* **NAT Gateway type**: Select the appropriate gateway size based on your expected outbound traffic requirements:
* **VPC-GW-S** (Up to 100 Mbps): Small development environments, low traffic
* **VPC-GW-M** (Up to 1 Gbps): Standard production workloads
* **VPC-GW-L** (Up to 3 Gbps): High-traffic applications
* **VPC-GW-XL** (Up to 10 Gbps): Very high-traffic, enterprise workloads
The Static IP feature is useful when connecting to external databases, third-party APIs, or enterprise services that require IP allowlisting. See [Scaleway Public Gateway documentation](https://www.scaleway.com/en/docs/network/vpc/concepts/#public-gateways) for more details.
To confirm, click `Next`.
In the `Ready to install your cluster` window, check that the services needed to install your cluster are correct.
You can now press the `Create and Install` button.
Your cluster is now displayed in your organization settings, featuring the `Installing...` status (orange status). Once your cluster is properly installed, its status turns to green and you will be able to deploy your applications on it.
You can follow the execution of the action via the cluster status and/or by accessing the [Cluster Logs](/configuration/clusters#logs)
## Managing your Cluster Settings
To manage the settings of an existing cluster:
Open your [Qovery Console](https://console.qovery.com).
On your organization overview, go to the **Clusters** tab.
Click on your cluster card and go to the **Settings** tab.
Below you can find a description of each section
### General
The `General` tab allows you to define high-level information on your cluster:
| Item | Description |
| ------------------ | ----------------------------------------------------- |
| Cluster Name | To edit the name of your cluster. |
| Description | To enter or edit the description of your cluster. |
| Production Cluster | To enter or edit the production flag of your cluster. |
### Credentials
Here you can manage here the cloud provider credentials associated with your cluster.
If you need to change the credentials:
* generate a new set of credentials on your cloud provider ([Procedure for Scaleway account](/installation/scaleway#connect-scaleway-account))
* create the new credential on the Qovery by opening the drop-down and selecting "New Credentials"
Once created and associated, you need to [update your cluster](/configuration/clusters#updating-a-cluster) to apply the change.
### Mirroring registry
In this tab, you will see that a container registry already exist (called `registry-{$UIID}`).
This is your cloud provider container registry used by Qovery to manage the deployment of your applications by mirroring the docker images.
The credentials configured on this registry are the one used to create the cluster. But you can still update them if you prefer to manage them separately (dedicated pair of creds just to access the registry).
Check [this link](/configuration/deployment/image-mirroring) for more information.
### Network
In the **Network** tab, you can configure advanced networking options for your Scaleway Kapsule cluster.
#### Static IP for Egress Traffic
By default, Scaleway clusters use random public IPs for outbound traffic. Enable the **Static IP for egress traffic** option if your applications need to connect to external services that require IP allowlisting.
This feature requires the **VPCGatewayFullAccess** IAM permission set in addition to the standard Qovery permissions. Make sure it is added to your Qovery IAM policy before enabling this option. See the [Scaleway IAM Permissions Reference](/getting-started/security-and-compliance/scaleway-iam-permissions#vpcgatewayfullaccess--static-ip-for-egress-traffic) for details.
**When to use:**
* External databases with IP-based authentication
* Third-party APIs requiring IP allowlisting
* Enterprise services with strict security policies
* Partner integrations that need stable source IPs
**To enable:**
1. Navigate to the **Network** tab in your cluster settings
2. Enable **Static IP for egress traffic**
3. Select the appropriate NAT Gateway type based on your traffic requirements
4. Click **Update** to apply the changes
**NAT Gateway Types:**
| Gateway Type | Bandwidth | Use Case |
| ------------- | -------------- | ------------------------------------------- |
| **VPC-GW-S** | Up to 100 Mbps | Small development environments, low traffic |
| **VPC-GW-M** | Up to 1 Gbps | Standard production workloads |
| **VPC-GW-L** | Up to 3 Gbps | High-traffic applications |
| **VPC-GW-XL** | Up to 10 Gbps | Very high-traffic, enterprise workloads |
Once enabled, all outbound traffic from your cluster will use the assigned static IP address instead of random IPs. Choose the gateway size that matches your expected outbound traffic volume. For detailed specifications and pricing, see [Scaleway Public Gateway documentation](https://www.scaleway.com/en/docs/network/vpc/concepts/#public-gateways) and [pricing](https://www.scaleway.com/en/pricing/network/).
Click **Next** to validate the credentials.
Qovery will test the credentials and verify it can access your Scaleway account.
If validation fails, double-check your API key has all required permissions attached via the policy.
Qovery requires these Scaleway permissions to manage your infrastructure:
* **Containers**: Create and manage Kapsule Kubernetes clusters
* **Network Services**: Configure Load Balancers, DNS, and Public Gateways
* **Compute**: Provision and manage instances for node pools
* **Storage**: Create and manage Block Storage volumes for persistent data
* **VPC**: Configure Private Networks, Security Groups, and network routing
One additional permission is needed for optional features:
* **VPC Gateway**: Required only if you enable the [Static IP for egress traffic](/configuration/integrations/kubernetes/scaleway/managed#static-ip-for-egress-traffic) feature
These permissions are applied via IAM policies attached to your API key's application.
Yes! You can create a custom IAM policy with more restrictive permissions. However, ensure it includes all the resource types needed for managing Kapsule, networking, compute, and storage. Missing permissions may cause deployment failures.
To rotate Scaleway credentials:
1. In Scaleway Console, go to **IAM** → **Applications**
2. Find your application (e.g., `qovery-manager`)
3. Go to **API keys** tab
4. Click **+ Generate API key** to create a new key
5. Update credentials in Qovery Console
6. Wait 24 hours to ensure all systems use new keys
7. Delete the old API key in Scaleway Console
8. Set a reminder to rotate again in 90 days
* **Access Key ID**: Starts with `SCW` followed by alphanumeric characters
* **Secret Access Key**: UUID format (xxxxxxxx-xxxx-xxxx-xxxx-xxxxxxxxxxxx)
* **Organization ID**: UUID format
* **Project ID**: UUID format
All UUIDs use the standard 8-4-4-4-12 hexadecimal format.
### Create the Cluster
Click on `Scaleway` as hosting mode and then `Qovery Managed` option.
In the `Create Cluster` window enter:
* **Cluster name**: enter the name of your choice for your cluster.
* **Description**: enter a description to identify better your cluster.
* **Production cluster**: select this option if your cluster will be used for production.
* **Region**: select the geographical area in which you want your cluster to be hosted.
* **Credentials**: select one of the existing cloud provider credentials or [create new credentials](/getting-started/installation/scaleway#connect-your-scaleway-account).
To confirm, click `Next`.
In the `Set Resources` window, select:
* **Instance type**: select the type of [worker nodes](/configuration/clusters#what-is-a-cluster) you want to deploy to your cluster.
* **Node auto-scaling**: define the minimum and the maximum number of worker nodes that your cluster can run. The lowest number is the number of worker nodes running on your infrastructure at any time, while the highest number is the maximum number of worker nodes that can automatically be deployed as traffic grows. Please note that a minimum of 3 worker nodes is required to deploy your Kapsule cluster.
* **Control plane type**: select the type of control plane managing your cluster. [Click here to know more](https://www.scaleway.com/en/docs/kubernetes/reference-content/kubernetes-control-plane-offers/)
Instance type selection from your Qovery Console has direct consequences on your cloud provider's bill. While Qovery allows you to switch to a different instance type whenever you want, it is your sole responsibility to keep an eye on your infrastructure costs, especially when you want to upsize.
Please be aware that changing the instance type or disk size might cause a downtime for your service.
For more information on the instance types provided by each cloud provider and their associated pricing, see [What are the different instance types available when creating a cluster?](/configuration/clusters#what-are-the-different-instance-types-available-when-creating-a-cluster)
Also, before downsizing, you need to ensure that your applications will still have enough resources to run correctly.
To confirm, click `Next`.
In the `Configure Network` window, configure your cluster networking options:
* **Static IP for egress traffic**: Enable this option if your applications need to connect to external services that require IP allowlisting. When enabled, your cluster will use a fixed public IP address for all outbound traffic.
* **NAT Gateway type**: Select the appropriate gateway size based on your expected outbound traffic requirements:
* **VPC-GW-S** (Up to 100 Mbps): Small development environments, low traffic
* **VPC-GW-M** (Up to 1 Gbps): Standard production workloads
* **VPC-GW-L** (Up to 3 Gbps): High-traffic applications
* **VPC-GW-XL** (Up to 10 Gbps): Very high-traffic, enterprise workloads
The Static IP feature is useful when connecting to external databases, third-party APIs, or enterprise services that require IP allowlisting. See [Scaleway Public Gateway documentation](https://www.scaleway.com/en/docs/network/vpc/concepts/#public-gateways) for more details.
To confirm, click `Next`.
In the `Ready to install your cluster` window, check that the services needed to install your cluster are correct.
You can now press the `Create and Install` button.
Your cluster is now displayed in your organization settings, featuring the `Installing...` status (orange status). Once your cluster is properly installed, its status turns to green and you will be able to deploy your applications on it.
You can follow the execution of the action via the cluster status and/or by accessing the [Cluster Logs](/configuration/clusters#logs)
## Managing your Cluster Settings
To manage the settings of an existing cluster:
Open your [Qovery Console](https://console.qovery.com).
On your organization overview, go to the **Clusters** tab.
Click on your cluster card and go to the **Settings** tab.
Below you can find a description of each section
### General
The `General` tab allows you to define high-level information on your cluster:
| Item | Description |
| ------------------ | ----------------------------------------------------- |
| Cluster Name | To edit the name of your cluster. |
| Description | To enter or edit the description of your cluster. |
| Production Cluster | To enter or edit the production flag of your cluster. |
### Credentials
Here you can manage here the cloud provider credentials associated with your cluster.
If you need to change the credentials:
* generate a new set of credentials on your cloud provider ([Procedure for Scaleway account](/installation/scaleway#connect-scaleway-account))
* create the new credential on the Qovery by opening the drop-down and selecting "New Credentials"
Once created and associated, you need to [update your cluster](/configuration/clusters#updating-a-cluster) to apply the change.
### Mirroring registry
In this tab, you will see that a container registry already exist (called `registry-{$UIID}`).
This is your cloud provider container registry used by Qovery to manage the deployment of your applications by mirroring the docker images.
The credentials configured on this registry are the one used to create the cluster. But you can still update them if you prefer to manage them separately (dedicated pair of creds just to access the registry).
Check [this link](/configuration/deployment/image-mirroring) for more information.
### Network
In the **Network** tab, you can configure advanced networking options for your Scaleway Kapsule cluster.
#### Static IP for Egress Traffic
By default, Scaleway clusters use random public IPs for outbound traffic. Enable the **Static IP for egress traffic** option if your applications need to connect to external services that require IP allowlisting.
This feature requires the **VPCGatewayFullAccess** IAM permission set in addition to the standard Qovery permissions. Make sure it is added to your Qovery IAM policy before enabling this option. See the [Scaleway IAM Permissions Reference](/getting-started/security-and-compliance/scaleway-iam-permissions#vpcgatewayfullaccess--static-ip-for-egress-traffic) for details.
**When to use:**
* External databases with IP-based authentication
* Third-party APIs requiring IP allowlisting
* Enterprise services with strict security policies
* Partner integrations that need stable source IPs
**To enable:**
1. Navigate to the **Network** tab in your cluster settings
2. Enable **Static IP for egress traffic**
3. Select the appropriate NAT Gateway type based on your traffic requirements
4. Click **Update** to apply the changes
**NAT Gateway Types:**
| Gateway Type | Bandwidth | Use Case |
| ------------- | -------------- | ------------------------------------------- |
| **VPC-GW-S** | Up to 100 Mbps | Small development environments, low traffic |
| **VPC-GW-M** | Up to 1 Gbps | Standard production workloads |
| **VPC-GW-L** | Up to 3 Gbps | High-traffic applications |
| **VPC-GW-XL** | Up to 10 Gbps | Very high-traffic, enterprise workloads |
Once enabled, all outbound traffic from your cluster will use the assigned static IP address instead of random IPs. Choose the gateway size that matches your expected outbound traffic volume. For detailed specifications and pricing, see [Scaleway Public Gateway documentation](https://www.scaleway.com/en/docs/network/vpc/concepts/#public-gateways) and [pricing](https://www.scaleway.com/en/pricing/network/).